[.NET] Creating HTTP API to Greenbone Vulnerability Manager using GVM-CLI
In this article, I will show how to create HTTP API for GVM-CLI
All code samples you can find here.
Greenbone Vulnerability Manager (GVM) is an open-source vulnerability management framework. It is designed to help organizations identify, assess, and manage security vulnerabilities in their IT infrastructure. The GVM framework includes several components, with OpenVAS (Open Vulnerability Assessment System) being one of the core components responsible for scanning and detecting vulnerabilities.
Currently, GVM does not have an HTTP API. In this article, I will show how to create such an API using .NET 9.
Installing GVM on Kali-Linux.
Note that GVM has different distributed packages on different Linux distributions. This instruction works fine on Kali Linux, which you can download here.
The first thing you have to do is install and configure the required packages using the following commands:
sudo apt-get update
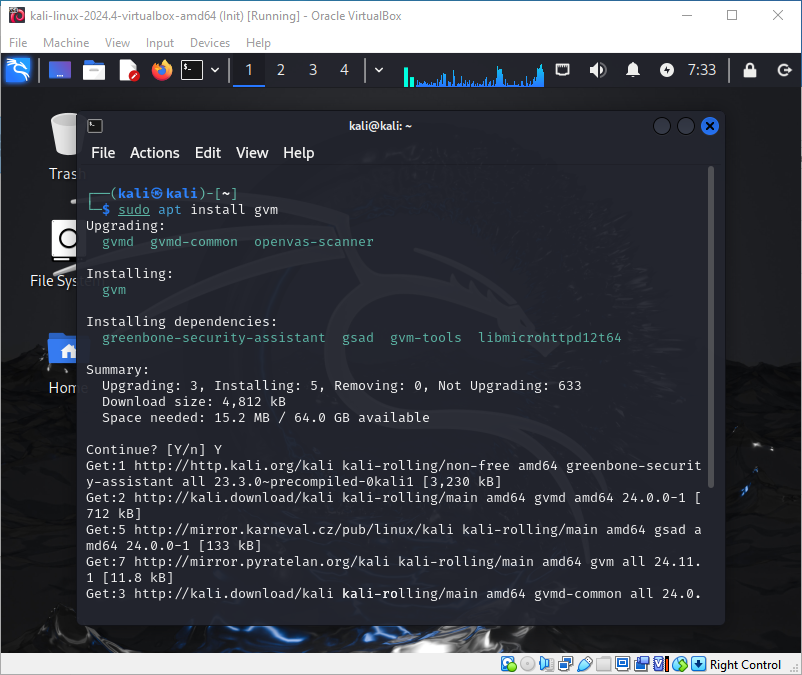
sudo apt install gvm
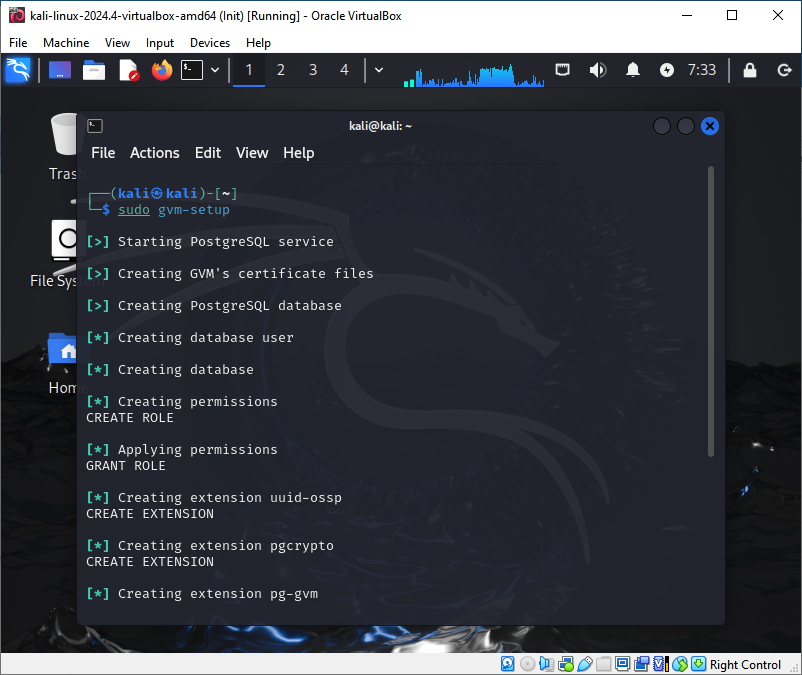
sudo gvm-setup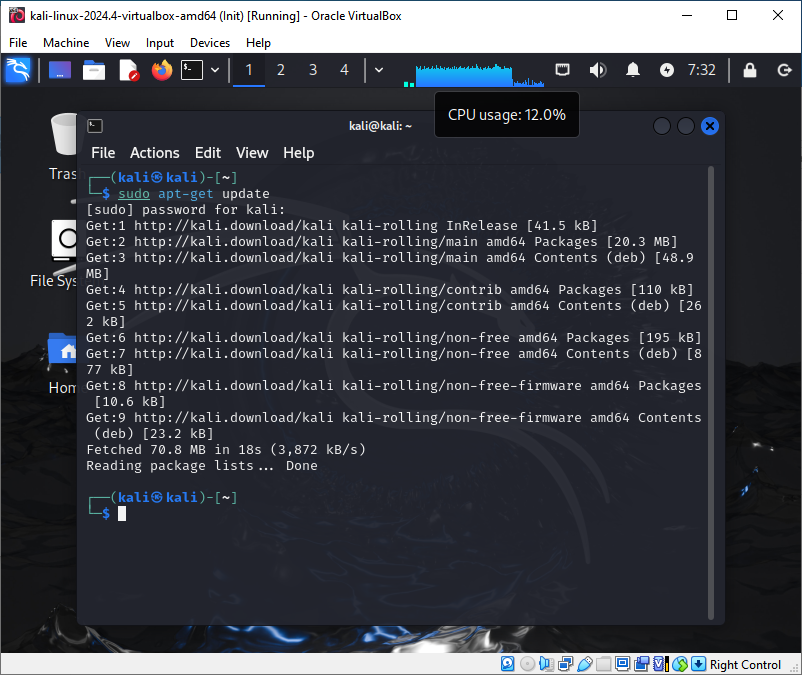
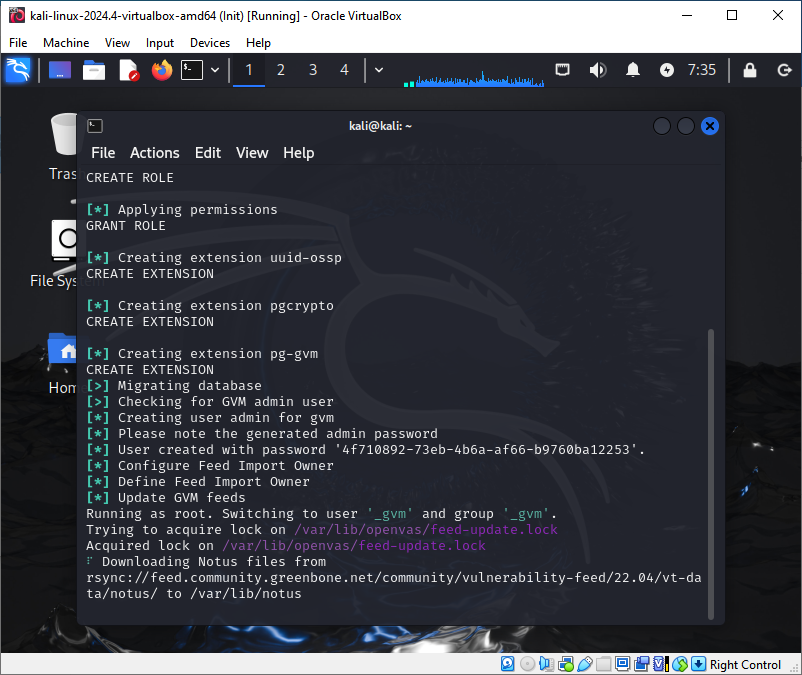
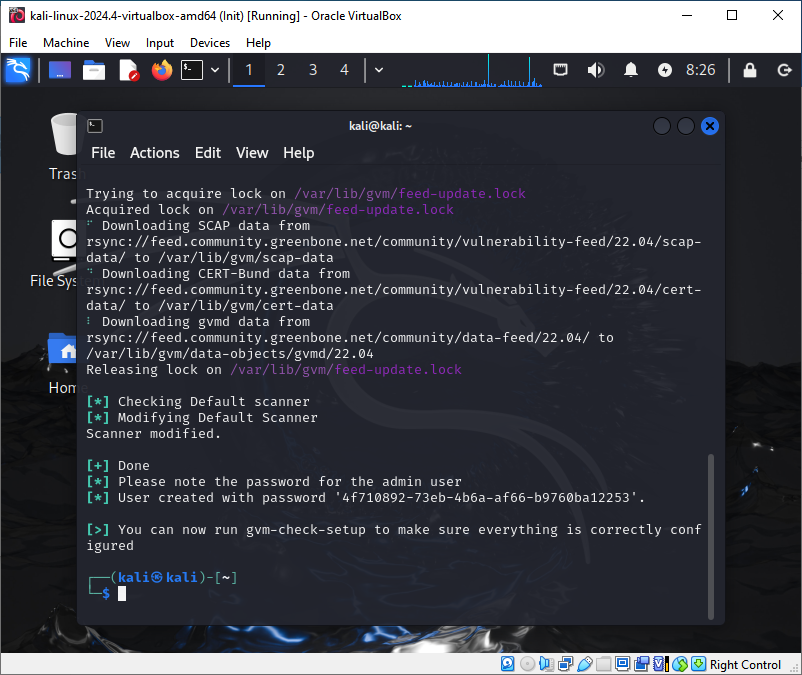
Please write down the password generated during configuration.
After that, we need to create a new user and add them to the required groups:
sudo useradd -m -s /bin/bash user
sudo passwd user
sudo usermod -aG _gvm user
sudo usermod -aG sudo user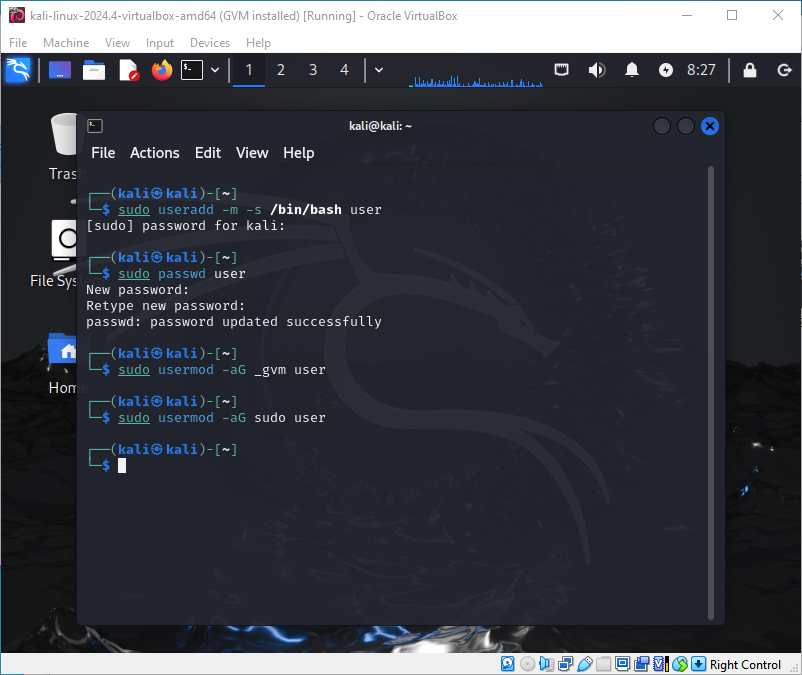
To be able to connect to the GVM web page from external IPs, we need to modify the configuration:
nano /usr/lib/systemd/system/gsad.service 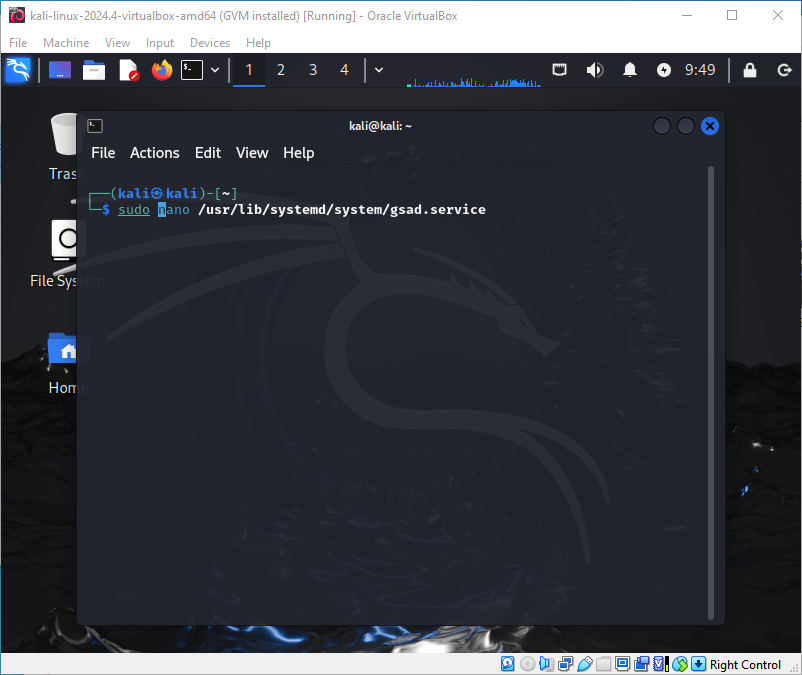
And change the line to:
ExecStart=/usr/sbin/gsad --foreground --listen 0.0.0.0 --port 9392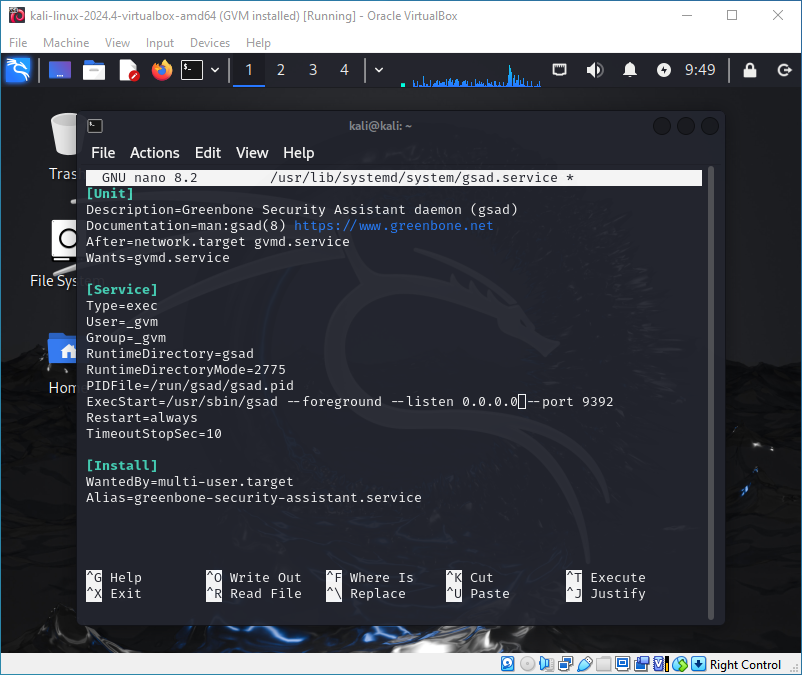
To configure GVM for automatic startup with the system, we need to create a new service. Edit the file:
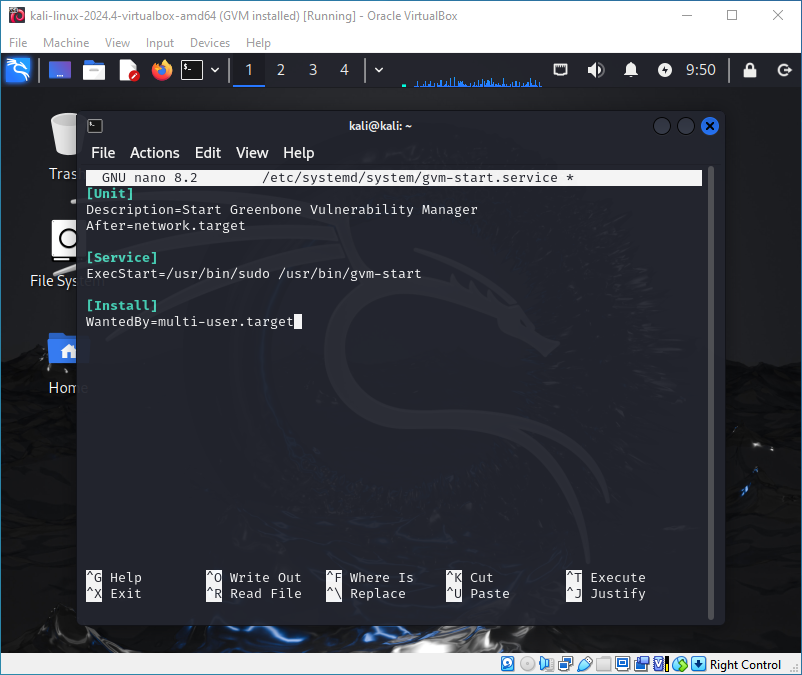
sudo nano /etc/systemd/system/gvm-start.serviceAnd paste this configuration:
[Unit]
Description=Start Greenbone Vulnerability Manager
After=network.target

[Service]
ExecStart=/usr/bin/sudo /usr/bin/gvm-start

[Install]
WantedBy=multi-user.target
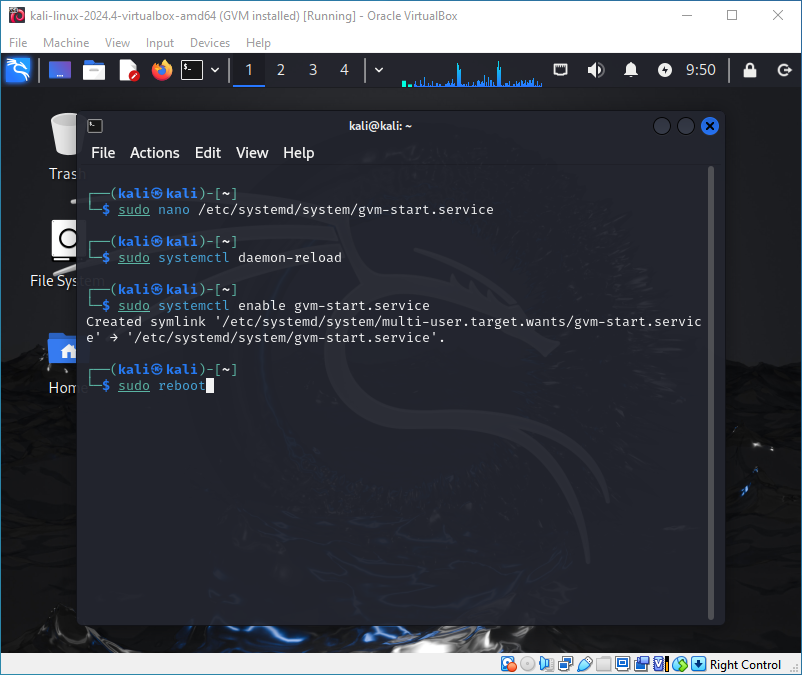
After that, execute the following commands:
sudo systemctl daemon-reload
sudo systemctl enable gvm-start.service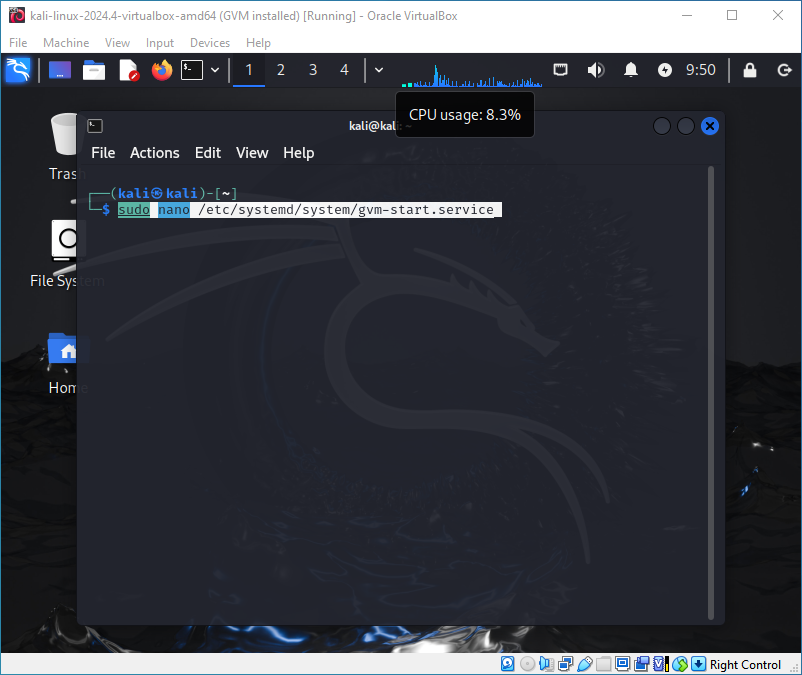
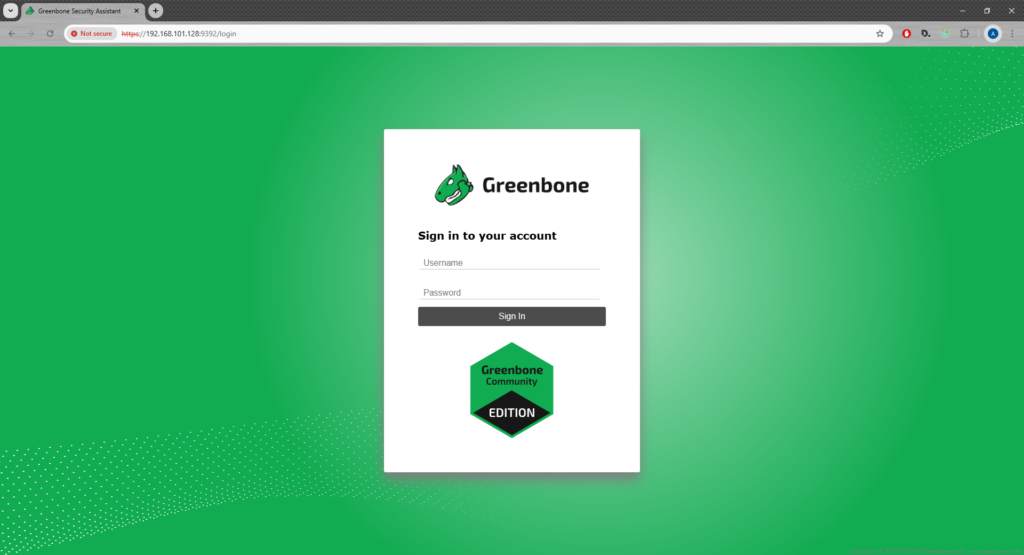
After restarting your system and logging in to the newly created user, you can access the GVM web page at https://your.ip:9392 and use gvm-cli.
To check if everything works, execute the following command. Note that the command must be executed with a user added to the _gvm group, which we did before.
gvm-cli --gmp-username admin --gmp-password your-password socket --xml '<get_version/>'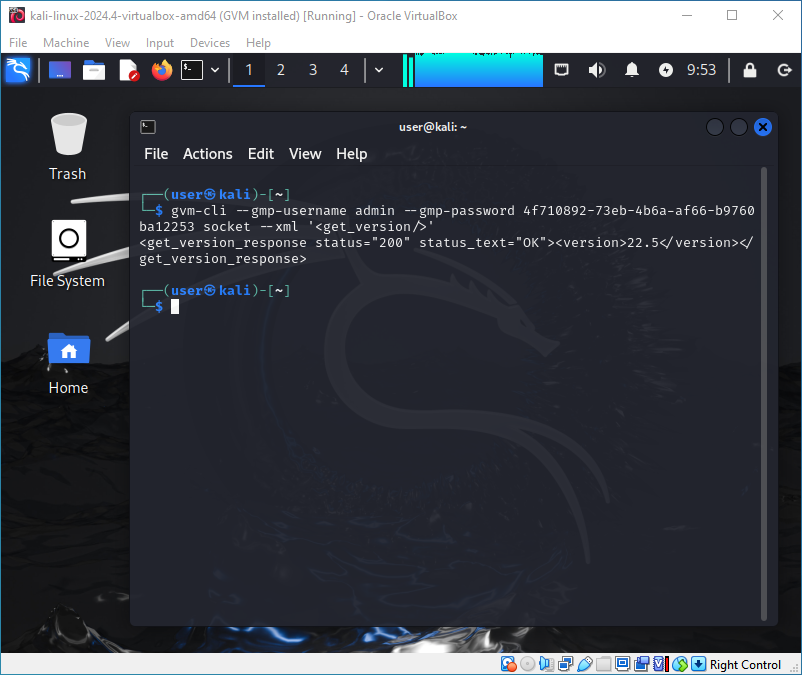
Creating .NET web application
What we want to do is allow the execution of the gvm-cli command with some parameters using a web API. So the first thing to do is create a service which is able to create a new process and pass the parameters to the CLI.
using GvmHttpProxy.Models;
using System.Diagnostics;

namespace GvmHttpProxy.Service
{
    public class GvmService
    {
        public GvmResponse ExecuteGvmCommand(string username, string password, string body)
        {

            string command = "gvm-cli";
            string arguments = $"--gmp-username {username} --gmp-password {password} socket --xml \\\"{body}\\\"";

            ProcessStartInfo startInfo = new ProcessStartInfo
            {
                FileName = "/bin/bash",
                Arguments = $"-c \"{command} {arguments}\"",
                RedirectStandardOutput = true,
                RedirectStandardError = true,
                UseShellExecute = false,
                CreateNoWindow = true
            };

            using (Process process = new Process { StartInfo = startInfo })
            {
                process.Start();

                string output = process.StandardOutput.ReadToEnd();
                string error = process.StandardError.ReadToEnd();

                process.WaitForExit();

                return new GvmResponse(output, error);
            }
        }
    }
}
As you can see, our method receives three parameters: username, password, and XML command to execute. The method returns the GvmResponse model, which looks like this:
namespace GvmHttpProxy.Models
{
    public class GvmResponse
    {
        public string Response { get; private set; }
        public string Error { get; private set; }

        public GvmResponse(string reponse, string error)
        {
            Response = reponse;
            Error = error;
        }
    }
}
We will authenticate with JWT Bearer, so we need to generate a JWT token. But before that, let’s define some configuration:
{
  "Logging": {
    "LogLevel": {
      "Default": "Information",
      "Microsoft.AspNetCore": "Warning"
    }
  },
  "AllowedHosts": "*",
  "Kestrel": {
    "EndPoints": {
      "Http": {
        "Url": "http://0.0.0.0:5000"
      },
      "Https": {
        "Url": "https://0.0.0.0:5001"
      }
    }
  },
  "Authorization": {
    "Key": "your-secret-key-your-secret-key-your-secret-key-your-secret-key-your-secret-key-your-secret-key",
    "TokenExpirationInMinutes":  30
  }
}
The most important settings are Authorization:Key – it’s a security key to generate the token (note that it must be long enough) and Authorization:TokenExpirationInMinutes – which tells how long the token will be valid.
Because we don’t want to have a separate database to keep login and password, we can use the login and password defined in GVM. The idea is to try to execute the gvm-cli command to check if the username and password are valid and, if they are, return the token to the user.
The problem is, when we already return the token to the user, we still need credentials to execute the command. We cannot save credentials in the token because of security, so we create an in-memory cache to map the token with credentials. To do this, we can create a cache service which will be registered as a singleton
using GvmHttpProxy.Models;
using Microsoft.Extensions.Caching.Memory;

namespace GvmHttpProxy.Service
{
    public class PasswordService
    {
        private readonly IConfiguration _configuration;

        public PasswordService(IConfiguration configuration)
        {
            this._configuration = configuration;
        }

        MemoryCache cache = new MemoryCache(new MemoryCacheOptions());

        public void AddCredentials(string token, Credentials credentials)
        {
            cache.Set(
                token,
                credentials,
                TimeSpan.FromMinutes(Convert.ToInt64(_configuration["Authorization:TokenExpirationInMinutes"]!)));
        }

        public Credentials GetCredentials(string token)
        {
            Credentials? credentials;
            if(cache.TryGetValue(token, out credentials))
            {
                return credentials!;
            }

            throw new UnauthorizedAccessException("Token expired");
        }
    }
}
Thanks to this class, we can add a new pair token-credentials for the time defined in the configuration and try to get credentials using the token from the memory cache.
Now we can create a service to generate the token:
using GvmHttpProxy.Models;
using Microsoft.IdentityModel.Tokens;
using System.IdentityModel.Tokens.Jwt;
using System.Text;

namespace GvmHttpProxy.Service
{
    public class TokenService
    {
        private readonly IConfiguration _configuration;
        private readonly PasswordService _passwordService;
        private readonly GvmService _gvmService;

        public TokenService(IConfiguration configuration, PasswordService passwordService, GvmService gvmService)
        {
            _configuration = configuration;
            _passwordService = passwordService;
            _gvmService = gvmService;
        }

        public string GetToken(Credentials credentials)
        {
            var gvmResponse = _gvmService.ExecuteGvmCommand(credentials.Username!, credentials.Password!, "<get_version/>");

            if (string.IsNullOrEmpty(gvmResponse.Error))
            {
                var token = GenerateJwtToken(credentials.Username!);

                _passwordService.AddCredentials("Bearer " + token, credentials);

                return token;
            }

            throw new UnauthorizedAccessException("Wrong username or password");
        }

        private string GenerateJwtToken(string username)
        {
            var key = new SymmetricSecurityKey(Encoding.UTF8.GetBytes(_configuration["Authorization:Key"]!));
            var creds = new SigningCredentials(key, SecurityAlgorithms.HmacSha256);

            var token = new JwtSecurityToken(
                expires: DateTime.Now.AddMinutes(Convert.ToInt64(_configuration["Authorization:TokenExpirationInMinutes"]!)),
                signingCredentials: creds);

            return new JwtSecurityTokenHandler().WriteToken(token);
        }
    }
}
As you can see, to validate credentials, we execute the command. If the command is executed without errors, it means the credentials are okay. Of course, we can get any other error, but in this version of the program, we don’t support it yet. After generating the token, we use our service to keep the credentials-token map in our memory cache.
Now we can generate our authorization controller:
using GvmHttpProxy.Models;
using GvmHttpProxy.Service;
using Microsoft.AspNetCore.Mvc;

[ApiController]
[Route("[controller]")]
public class AuthController : ControllerBase
{
    private readonly TokenService _tokenService;

    public AuthController(TokenService tokenService)
    {
        _tokenService = tokenService;
    }

    [HttpPost]
    [Consumes("application/xml")]
    public IActionResult Login([FromBody] Credentials credentials)
    {
        try
        {
            var token = _tokenService.GetToken(credentials);

            return Ok(new Token()
            {
                Bearer = token
            });
        }
        catch (UnauthorizedAccessException)
        {
            return Unauthorized();
        }
    }
}
Note that we support only application/xml requests body, because gvm-cli works with XML only, so the login method will be also in XML.
In this controller, we return the Token model and we receive the Credentials model. These models look like this:
using System.Xml.Serialization;

namespace GvmHttpProxy.Models
{
    [XmlRoot("Token")]
    public class Token
    {
        [XmlElement("Bearer")]
        public string? Bearer;
    }
}
using System.ComponentModel.DataAnnotations;
using System.Xml.Serialization;
namespace GvmHttpProxy.Models
{
[XmlRoot("Credentials")]
public class Credentials
{
[XmlElement("Username")]
[Required(ErrorMessage = "The Username field is required.")]
public string? Username { get; set; }
[XmlElement(ElementName = "Password")]
[Required(ErrorMessage = "The Password field is required.")]
public string? Password { get; set; }
}
}Next thing to do is to create a controller which allows the execution of GVM commands. The controller looks like this:
using GvmHttpProxy.Extensions;
using GvmHttpProxy.Service;
using Microsoft.AspNetCore.Authorization;
using Microsoft.AspNetCore.Mvc;
using System.Xml.Linq;

namespace GvmHttpProxy.Controllers
{
    [ApiController]
    [Route("[controller]")]
    public class GvmController : ControllerBase
    {
        private readonly GvmService _gvmService;
        private readonly PasswordService _passwordService;

        public GvmController(GvmService gvmService, PasswordService passwordService)
        {
            _gvmService = gvmService;
            _passwordService = passwordService;
        }

        [HttpPost]
        [Authorize]
        [Consumes("application/xml")]
        public IResult ExecuteGvmCommand([FromBody] XElement xmlRequest)
        {
            try
            {
                var authorizationHeader = Request.Headers["Authorization"].ToString();
                var credentials = _passwordService.GetCredentials(authorizationHeader);

                string body = xmlRequest.Serialize();

                var result = _gvmService.ExecuteGvmCommand(credentials.Username!, credentials.Password!, body);

                if (!string.IsNullOrWhiteSpace(result.Error))
                {
                    return Results.Content(result.Error, "application/xml", statusCode: 500);
                }

                return Results.Content(result.Response, "application/xml");
            }
            catch(UnauthorizedAccessException)
            {
                return Results.Content("Token expired", "application/xml", statusCode: 401);
            }
        }
    }
}
In this code, the first thing to do is get the token from the headers and replace it with credentials. After that, we need to serialize the request, execute the GVM command, and return the result to the user.
Serialization of XML is a bit tricky, because when we send command like <command id=’1’/> it works. But because we map it first to XElement, when we serialize it back (for example using .ToString() method), it will be looks like <command id=”1″/> – – apostrophes are replaced with quotation marks and the GVM-CLI command will fail. So, we need our own serializer which keeps apostrophes. The serialization method looks like this:
using System.Xml.Linq;

namespace GvmHttpProxy.Extensions
{
    public static class XmlExtensions
    {
        public static string Serialize(this XElement element)
        {
            var sb = new System.Text.StringBuilder();
            sb.Append('<').Append(element.Name);

            foreach (var attr in element.Attributes())
            {
                sb.Append(' ')
                  .Append(attr.Name)
                  .Append('=')
                  .Append('\'')
                  .Append(attr.Value)
                  .Append('\'');
            }

            if (element.HasElements || !string.IsNullOrEmpty(element.Value))
            {
                sb.Append('>');

                foreach (var child in element.Elements())
                {
                    sb.Append(Serialize(child));
                }

                if (!string.IsNullOrEmpty(element.Value))
                {
                    sb.Append(element.Value);
                }

                sb.Append("</").Append(element.Name).Append('>');
            }
            else
            {
                sb.Append(" />");
            }

            return sb.ToString();
        }
    }
}
The last thing to do is create the program class.
using GvmHttpProxy.Service;
using Microsoft.AspNetCore.Authentication.JwtBearer;
using Microsoft.IdentityModel.Tokens;
using Microsoft.OpenApi.Models;
using System.Text;

var builder = WebApplication.CreateBuilder(args);

builder.Services.AddControllers(options =>
{
    options.RespectBrowserAcceptHeader = true;
    options.OutputFormatters.Clear();
})
.AddXmlSerializerFormatters()
.AddJsonOptions(options => options.JsonSerializerOptions.PropertyNamingPolicy = null);

builder.Services.AddEndpointsApiExplorer();

builder.Configuration.AddJsonFile("appsettings.json");

builder.Services.AddSwaggerGen(opt =>
{
    opt.AddSecurityDefinition("Bearer", new OpenApiSecurityScheme
    {
        BearerFormat = "JWT",
        Description = "JWT Authorization header using the Bearer scheme.",
        Name = "Authorization",
        In = ParameterLocation.Header,
        Type = SecuritySchemeType.Http,
        Scheme = "Bearer"
    });

    opt.AddSecurityRequirement(new OpenApiSecurityRequirement
    {
        {
            new OpenApiSecurityScheme
            {
                Reference = new OpenApiReference
                {
                    Id = "Bearer",
                    Type = ReferenceType.SecurityScheme
                }
            },
            Array.Empty<string>()
        }
    });
});

builder.Services.AddAuthentication(JwtBearerDefaults.AuthenticationScheme)
    .AddJwtBearer(options =>
    {
        options.TokenValidationParameters = new TokenValidationParameters
        {
            ValidateIssuer = false,
            ValidateAudience = false,
            ValidateLifetime = true,
            ValidateIssuerSigningKey = true,
            IssuerSigningKey = new SymmetricSecurityKey(Encoding.UTF8.GetBytes(builder.Configuration["Authorization:Key"]!))
        };
    });

builder.Services.AddScoped<GvmService>();
builder.Services.AddScoped<TokenService>();
builder.Services.AddSingleton<PasswordService>();

var app = builder.Build();

app.UseSwagger();
app.UseSwaggerUI();
app.UseAuthentication();
app.UseAuthorization();
app.MapControllers();

app.Run();
We can see that we removed JSON serialization options – because we support only XML. We are adding Swagger to be able to browse our API, we are adding JWT authentication, and we are registering our services.
That’s it – the application works. Now let’s deploy and test our application in Kali-Linux.
Deploying application on Kali-Linux
I will show how to deploy the application by downloading it from GitHub, but we can also copy files from our machine.
The first thing to do is to install .NET 9 SDK on our machine. The full instruction can be found on the Microsoft page, but I will also write it here:
To install .NET 9 SDK execute the following commands:
wget https://packages.microsoft.com/config/debian/12/packages-microsoft-prod.deb -O packages-microsoft-prod.deb
sudo dpkg -i packages-microsoft-prod.deb
rm packages-microsoft-prod.deb
sudo apt-get update && \
  sudo apt-get install -y dotnet-sdk-9.0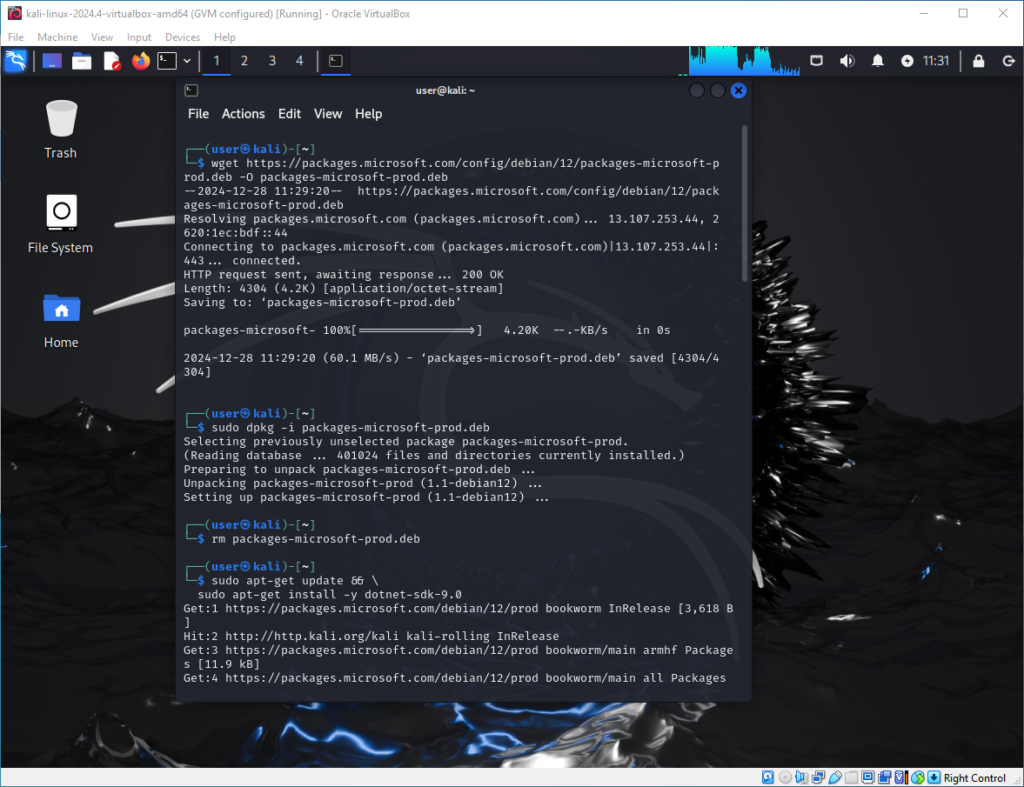
Now we can create two folders: “dev” for source code and “app” for binaries. After that, we can clone our repository and open the project folder:
cd /home/user/
mkdir dev
mkdir app
cd dev
git clone https://github.com/adammajstrak/gvm-http-proxy.git
cd gvm-http-proxy/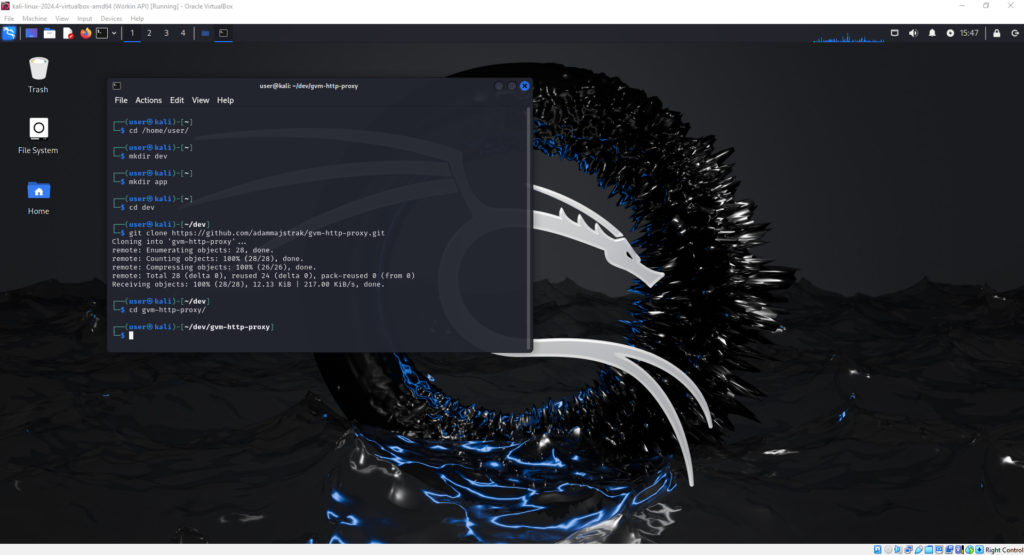
When we are in the right folder, we can publish our application to the newly created app folder:
dotnet publish -c Release -o /home/user/app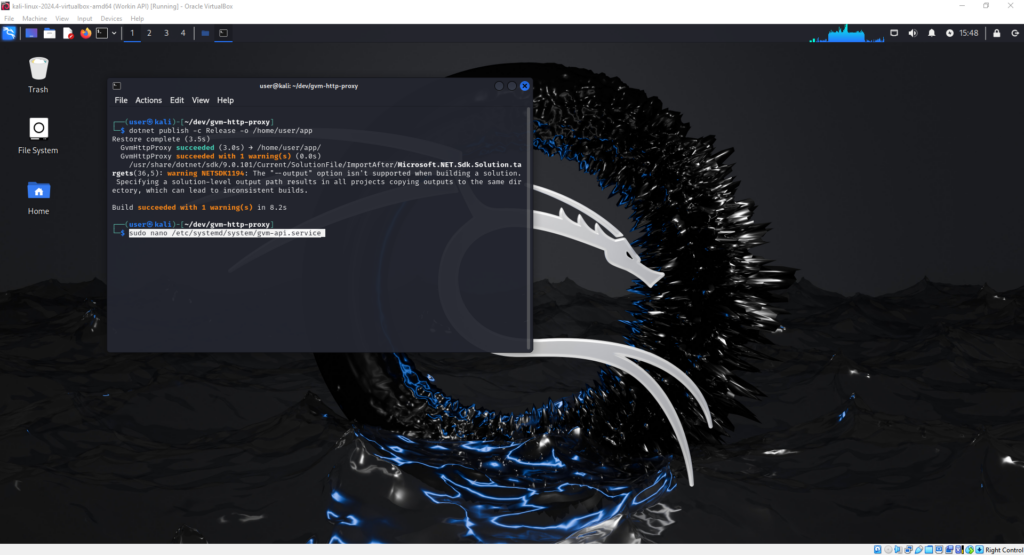
The next thing is to create a service to start up our application when the system starts.
Edit the file:
sudo nano /etc/systemd/system/gvm-api.serviceAnd paste the configuration
[Unit]
Description=GVM-API
After=network.target

[Service]
WorkingDirectory=/home/user/app
ExecStart=/usr/bin/dotnet /home/user/app/GvmHttpProxy.dll
Restart=always
User=user
Group=_gvm
#Environment=ASPNETCORE_ENVIRONMENT=Production

[Install]
WantedBy=multi-user.target
Now you can reload the configuration, enable the service and start it:
sudo systemctl daemon-reload
sudo systemctl enable gvm-api.service
sudo systemctl start gvm-api.service
sudo systemctl status gvm-api.service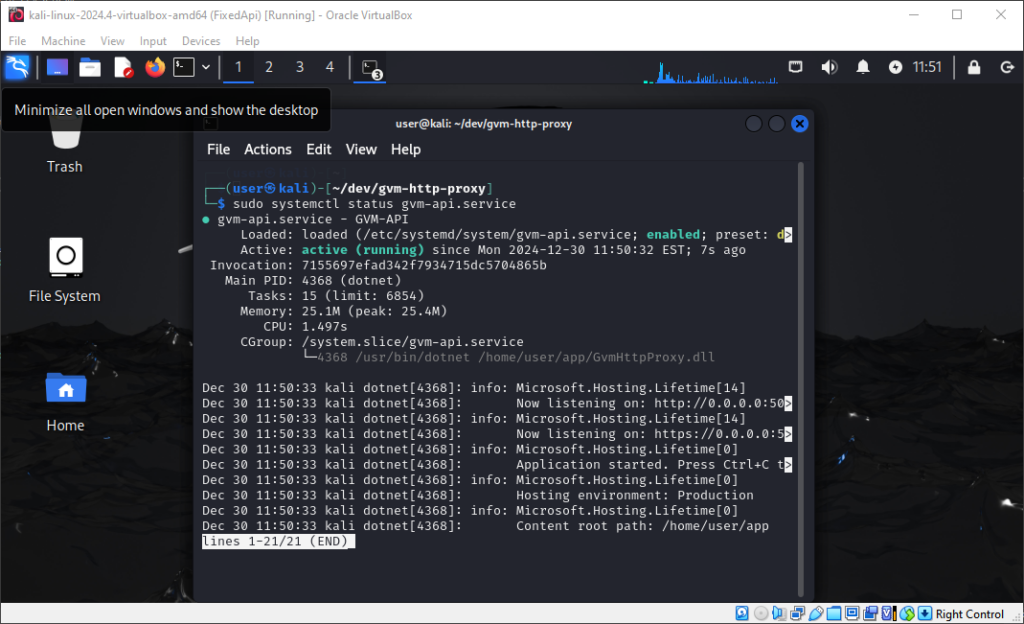
Now let’s test our application
My ip address is 192.168..101.128 so I go to web page https://192.168..101.128:5001/swagger.
Your IP you can check by executing the following commands:
ip addr showBecause I didn’t install certificates, I need to ignore browser warnings.
After executing the /auth endpoint, you should receive a token:
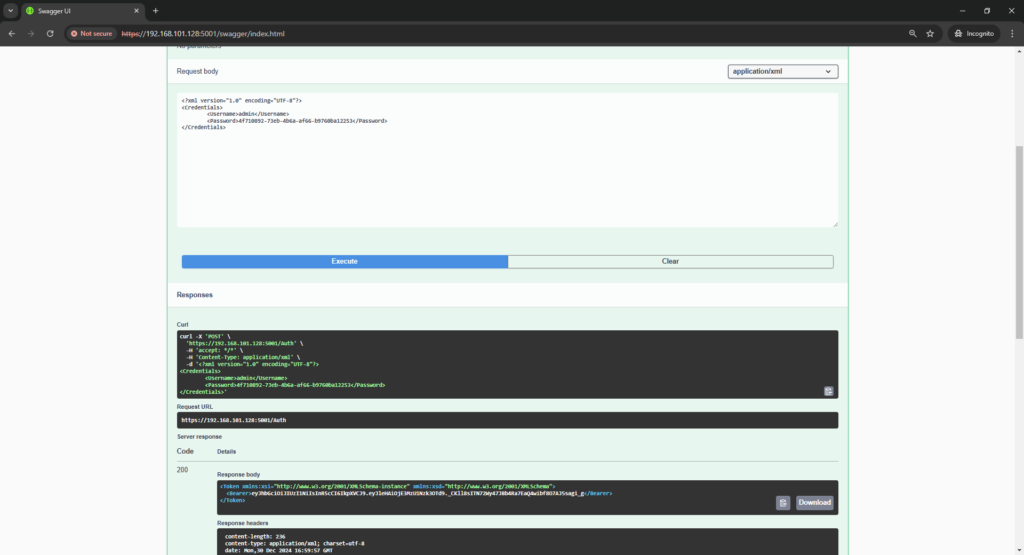
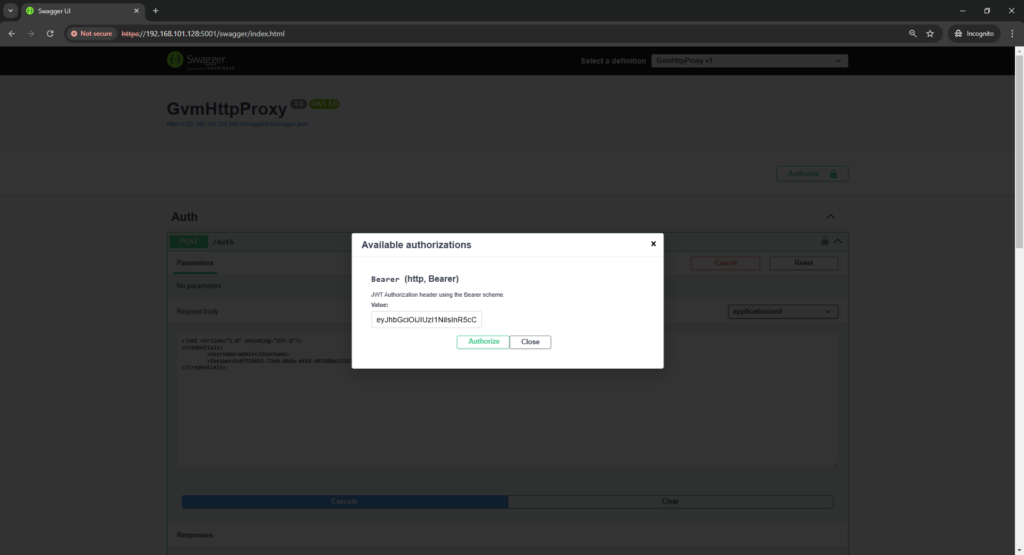
Copy and paste this token by clicking the “authorize” button.
Now let’s try to execute some GVM commands:
All commands you can find in the Greenbone documentation
Let’s try to execute a command listing all scanners:
<get_scanners/>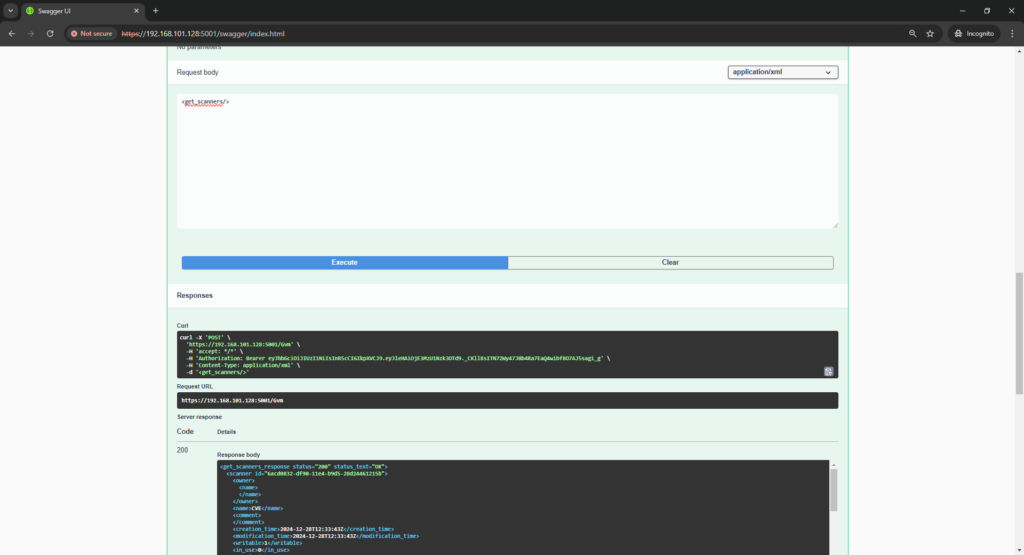
As you can see – everything works 😉